

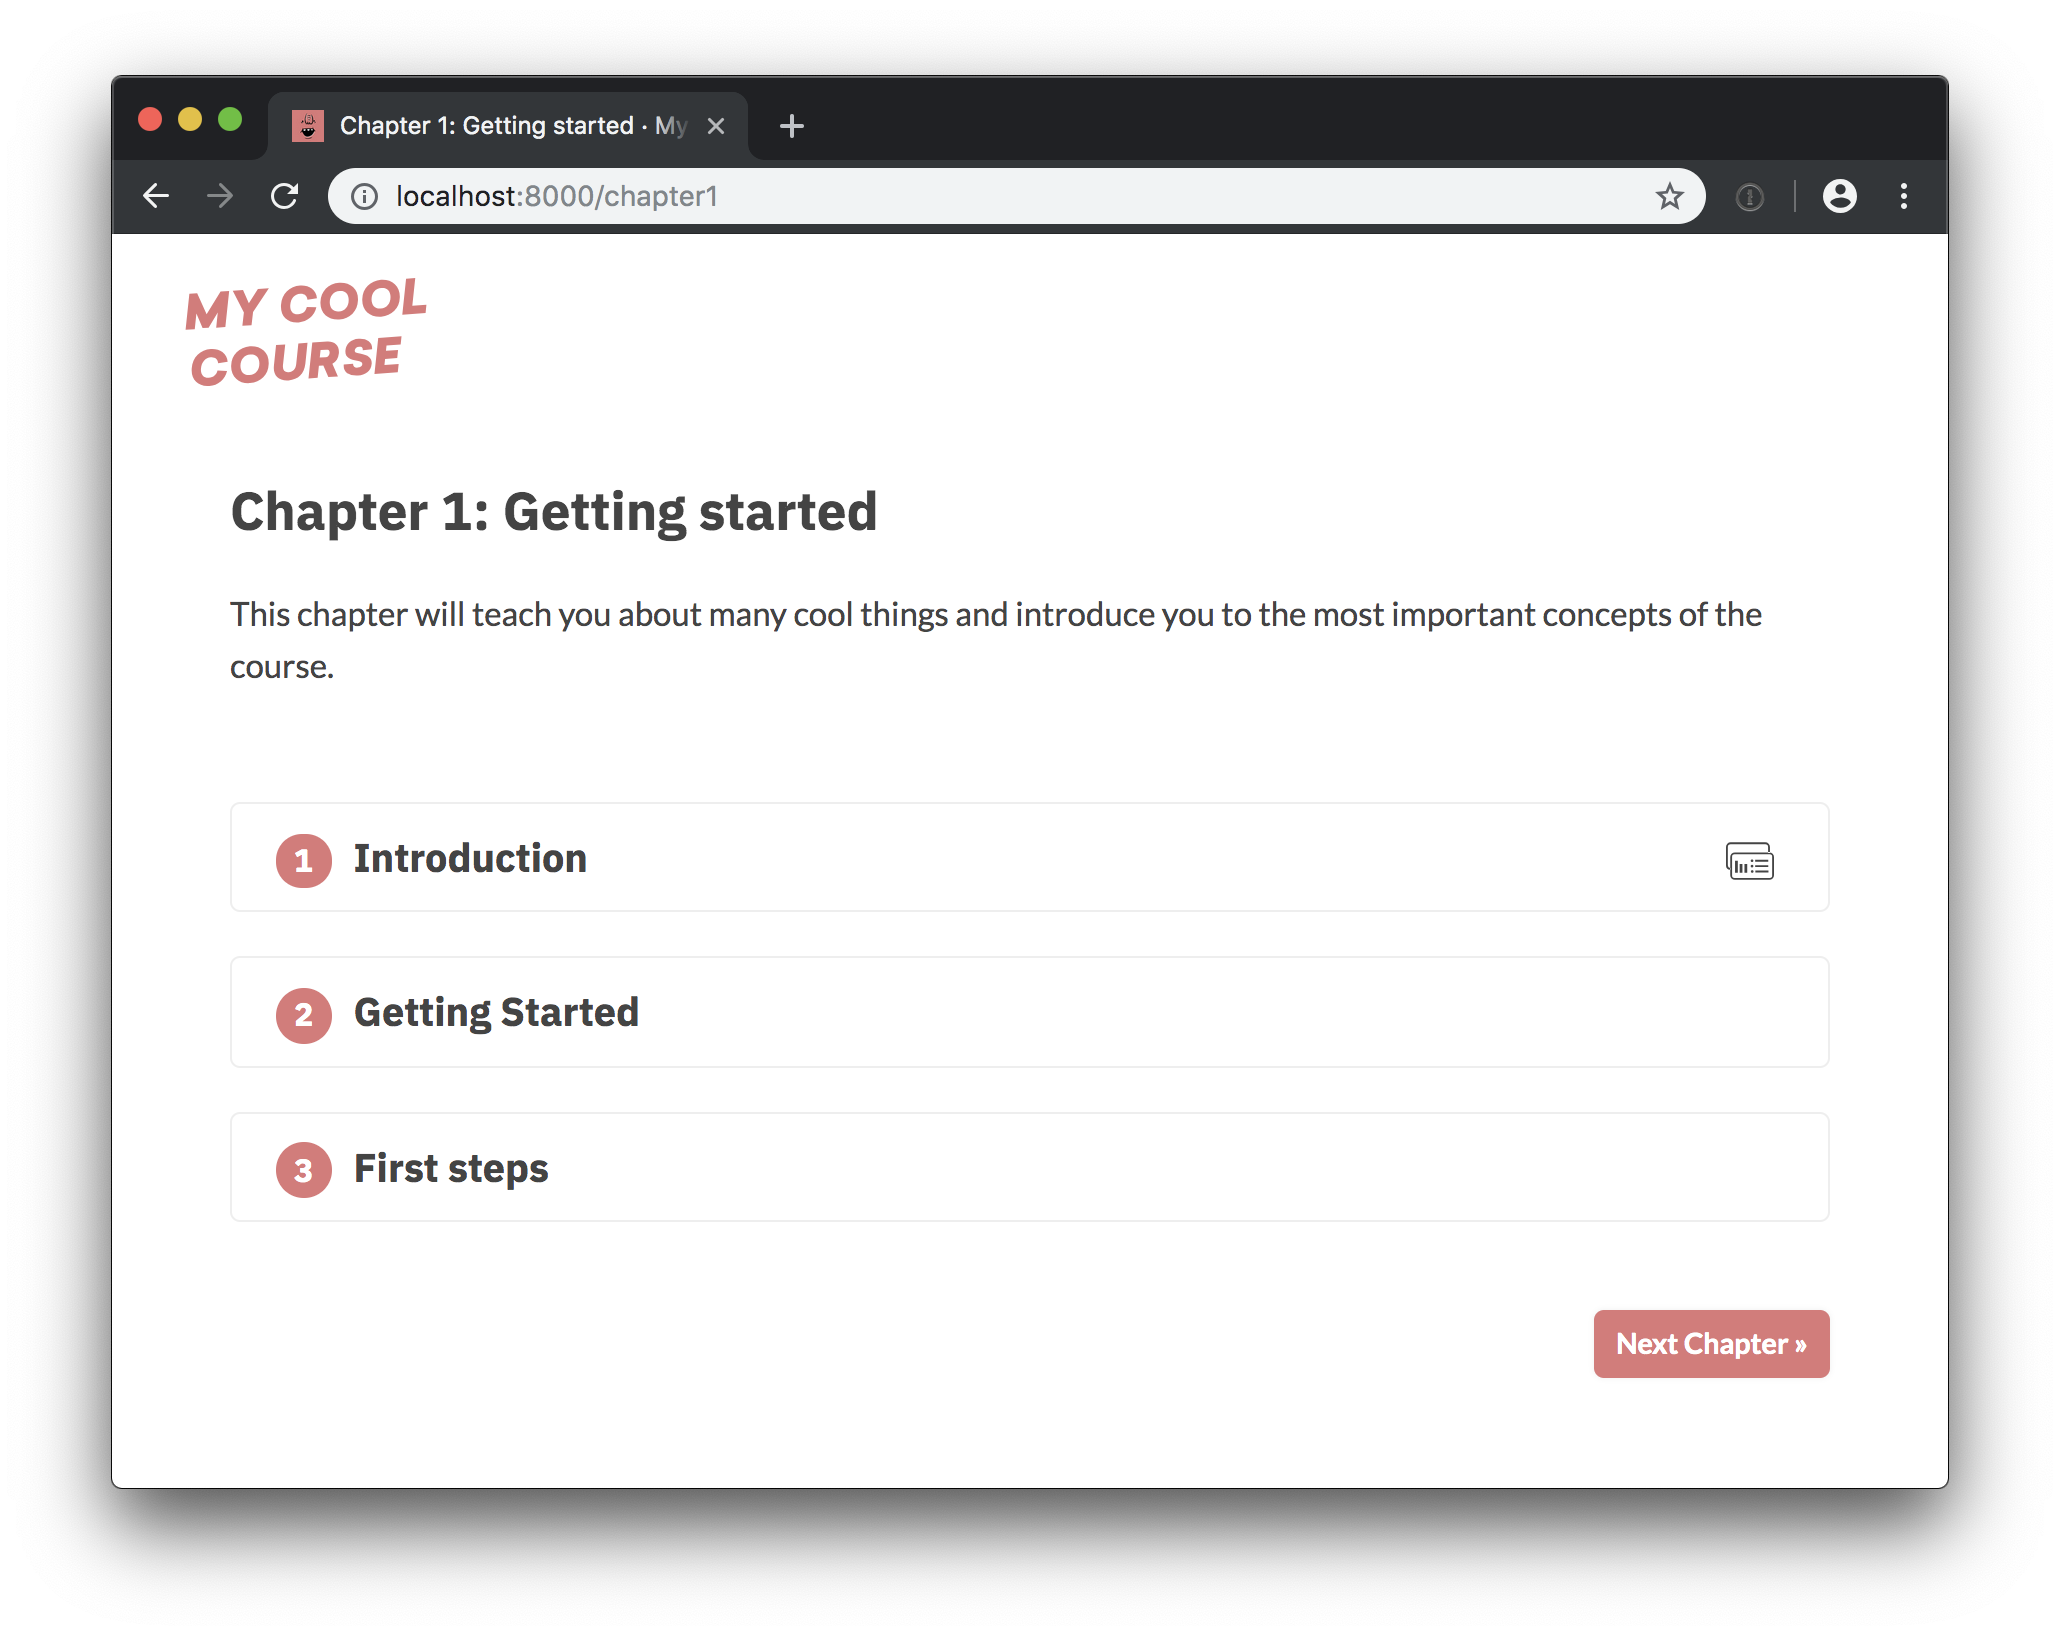
Online course starter: R
This is a starter repo based on the course framework I developed for my spaCy course. The front-end is powered by Gatsby and Reveal.js and the back-end code execution uses Binder
This repo could use some better code examples. Also, if you have experience with R, feel free to suggest improvements to the test logic and template. It all works as expected, but there might be ways to make it more elegant.

✅ Quickstart
- Import this repo, install it and make sure
the app is running locally. - Customize the
meta.jsonand
binder/install.R. - Build a Binder from the
binderbranch of this repo. - Add content (chapters, exercises and slides) and optionally add separate
content license. - Customize the UI theme in
theme.sassand update images in
staticas needed. - Deploy the app, e.g. to Netlify.
Running the app
To start the local development server, install Gatsby
and then all other dependencies. This should serve up the app on
localhost:8000.
npm install -g gatsby-cli  # Install Gatsby globally
npm install                # Install dependencies
npm run dev                # Run the development server
🎨 Customization
The app separates its source and content – so you usually shouldn't have to dig
into the JavaScript source to change things. The following points of
customization are available:
| Location | Description |
|---|---|
meta.json |
General config settings, title, description etc. |
theme.sass |
Color theme. |
binder/install.R |
Packages to install. |
binder/runtime.txt |
YYYY-MM-DD snapshot at MRAN that will be used for installing libraries. See here for details. |
chapters |
The chapters, one Markdown file per chapter. |
slides |
The slides, one Markdown file per slide deck. |
static |
Static assets like images, will be copied to the root. |
meta.json
The following meta settings are available. Note that you have to re-start
Gatsby to see the changes if you're editing it while the server is running.
| Setting | Description |
|---|---|
courseId |
Unique ID of the course. Will be used when saving completed exercises to the browser's local storage. |
title |
The title of the course. |
slogan |
Course slogan, displayed in the page title on the front page. |
description |
Course description. Used for site meta and in footer. |
bio |
Author bio. Used in the footer. |
siteUrl |
URL of the deployed site (without trailing slash). |
twitter |
Author twitter handle, used in Twitter cards meta. |
fonts |
Google Fonts to load. Should be the font part of the URL in the embed string, e.g. Lato:400,400i,700,700i. |
testTemplate |
Template used to validate the answers. ${solution} will be replaced with the user code and ${test} with the contents of the test file. |
juniper.repo |
Repo to build on Binder in user/repo format. Usually the same as this repo. |
juniper.branch |
Branch to build. Ideally not master, so the image is not rebuilt every time you push. |
juniper.lang |
Code language for syntax highlighting. |
juniper.kernelType |
The name of the kernel to use. |
juniper.debug |
Logs additional debugging info to the console. |
showProfileImage |
Whether to show the profile image in the footer. If true, a file static/profile.jpg needs to be available. |
footerLinks |
List of objects with "text" and "url" to display as links in the footer. |
theme |
Currently only used for the progressive web app, e.g. as the theme color on mobile. For the UI theme, edit theme.sass. |
Static assets
All files added to /static will become available at the root of the deployed
site. So /static/image.jpg can be referenced in your course as /image.jpg.
The following assets need to be available and can be customized:
| File | Description |
|---|---|
icon.png |
Custom favicon. |
logo.svg |
The course logo. |
profile.jpg |
Photo or profile image. |
social.jpg |
Social image, displayed in Twitter and Facebook cards. |
icon_check.svg |
"Check" icon displayed on "Mark as completed" button. |
icon_slides.svg |
Icon displayed in the corner of a slides exercise. |
✏️ Content
File formats
Chapters
Chapters are placed in /chapters and are Markdown files
consisting of <exercise> components. They'll be turned into pages, e.g.
/chapter1. In their frontmatter block at the top of the file, they need to
specify type: chapter, as well as the following meta:
---
title: The chapter title
description: The chapter description
prev: /chapter1 # exact path to previous chapter or null to not show a link
next: /chapter3 # exact path to next chapter or null to not show a link
id: 2 # unique identifier for chapter
type: chapter # important: this creates a standalone page from the chapter
---
Slides
Slides are placed in /slides and are markdown files consisting of
slide content, separated by ---. They need to specify the following
frontmatter block at the top of the file:
---
type: slides
---
The first and last slide use a special layout and will display the headline
in the center of the slide. Speaker notes (in this case, the script) can be
added at the end of a slide, prefixed by Notes:. They'll then be shown on the
right next to the slides. Here's an example slides file:
---
type: slides
---

# Processing pipelines

Notes: This is a slide deck about processing pipelines.

---

# Next slide

- Some bullet points here
- And another bullet point

<img src="/image.jpg" alt="An image located in /static" />
Custom Elements
When using custom elements, make sure to place a newline between the
opening/closing tags and the children. Otherwise, Markdown content may not
render correctly.
<exercise>
Container of a single exercise.
| Argument | Type | Description |
|---|---|---|
id |
number / string | Unique exercise ID within chapter. |
title |
string | Exercise title. |
type |
string | Optional type. "slides" makes container wider and adds icon. |
| children | - | The contents of the exercise. |
<exercise id="1" title="Introduction to spaCy">

Content goes here...

</exercise>
<codeblock>
| Argument | Type | Description |
|---|---|---|
id |
number / string | Unique identifier of the code exercise. |
source |
string | Name of the source file (without file extension). Defaults to exc_${id} if not set. |
solution |
string | Name of the solution file (without file extension). Defaults to solution_${id} if not set. |
test |
string | Name of the test file (without file extension). Defaults to test_${id} if not set. |
| children | string | Optional hints displayed when the user clicks "Show hints". |
<codeblock id="02_03">

This is a hint!

</codeblock>
<slides>
Container to display slides interactively using Reveal.js and a Markdown file.
| Argument | Type | Description |
|---|---|---|
source |
string | Name of slides file (without file extension). |
<slides source="chapter1_01_introduction-to-spacy">
</slides>
<choice>
Container for multiple-choice question.
| Argument | Type | Description |
|---|---|---|
id |
string / number | Optional unique ID. Can be used if more than one choice question is present in one exercise. |
| children | nodes | Only <opt> components for the options. |
<choice>

<opt text="Option one">You have selected option one! This is not good.</opt>
<opt text="Option two" correct="true">Yay! </opt>

</choice>
<opt>
A multiple-choice option.
| Argument | Type | Description |
|---|---|---|
text |
string | The option text to be displayed. Supports inline HTML. |
correct |
string | "true" if the option is the correct answer. |
| children | string | The text to be displayed if the option is selected (explaining why it's correct or incorrect). |
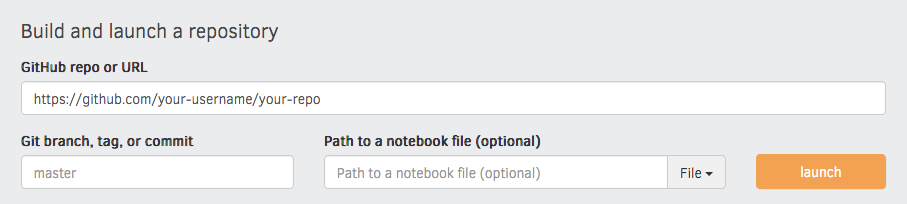
Setting up Binder
The install.R in the repository defines the packages that
are installed when building it with Binder. You can specify the binder settings
like repo, branch and kernel type in the "juniper" section of the meta.json.
I'd recommend running the very first build via the interface on the
Binder website, as this gives you a detailed build log
and feedback on whether everything worked as expected. Enter your repository
URL, click "launch" and wait for it to install the dependencies and build the
image.
Adding tests
To validate the code when the user hits "Submit", we're currently using a
slightly hacky trick. Since the R code is sent back to the kernel as a string,
we can manipulate it and add tests – for example, exercise exc_01_02_01.R will
be validated using test_01_02_01.R (if available). The user code and test are
combined using a string template. At the moment, the testTemplate in the
meta.json looks like this:
success <- function(text) {
    cat(paste("\033[32m", text, "\033[0m", sep = ""))
}

.solution <- "${solutionEscaped}"

${solution}

${test}
tryCatch({
    test()
}, error = function(e) {
    cat(paste("\033[31m", e[1], "\033[0m", sep = ""))
})
If present, ${solution} will be replaced with the string value of the
submitted user code, and ${solutionEscaped} with the code but with all "
replaced by \", so we can assign it to a variable as a string and check
whether the submission includes something. We also insert the regular solution,
so we can actually run it and check the objects it creates. ${test} is
replaced by the contents of the test file. The template also defines a success
function, which prints a formatted green message and can be used in the tests.
Finally, the tryCatch expression checks if the test function raises a stop
and if so, it outputs the formatted error message. This also hides the full
error traceback (which can easily leak the correct answers).
A test file could then look like this:
test <- function() {
    if (some_var != length(mtcars)) {
        stop("Are you getting the correct length?")
    }
    if (!grepl("print(mtcars$gear)", .solution, fixed = TRUE)) {
        stop("Are you printing the correct variable?")
    }
    success("Well done!")
}
The string answer is available as .solution, and the test also has access to
the solution code.


